In the automotive industry, nondestructive testing technology is an important means to improve the quality control of automobiles. At present, NDT technology is applied in many aspects such as research and development, manufacturing and maintenance of automobiles.This article introduces NDT technologies such as radiographic inspection method, penetration testing method, eddy current detection method, ultrasonic inspection method, magnetic particle inspection method and laser holographic inspection method, and describes the specific application of NDT technology in the automotive industry, analyzes the future development of NDT technology in the automotive industry, and hopes that through the application of NDT technology, the quality control level of automobiles can be better improved.
By using the non-destructive monitoring method, it is possible to find out the various defects existing in different materials and components by testing the internal structure of different materials and showing different responses to heat, sound, light, electricity, etc., without damaging the object under inspection. At the same time, the type, characteristics, number, size and location of the formed defects and other parameters can be obtained through the inspection. In the process of continuous development of electronic technology and computer technology, it also greatly promotes the development of nondestructive testing technology.
It can be used to test the uniformity and reliability of different materials, mostly applied to the following aspects: quantitative analysis of the correlation between different types and intensity of defects; evaluation of the remaining life and load life of different components; detection of internal structural incompleteness and defects formed during the operation of various equipment, so as to find the problems of equipment in a more timely manner and ensure the safety of the equipment in operation.
At the present stage, the widely used method in non-destructive testing technology is the radiation irradiation method. The method is based on the fact that different materials have different absorption and attenuation properties to the rays, so that the blackness of the negative can be different to detect the defects existing in the material. It is used in the automotive industry to inspect castings and welded components. For example, camshafts and wheel hubs are inspected.
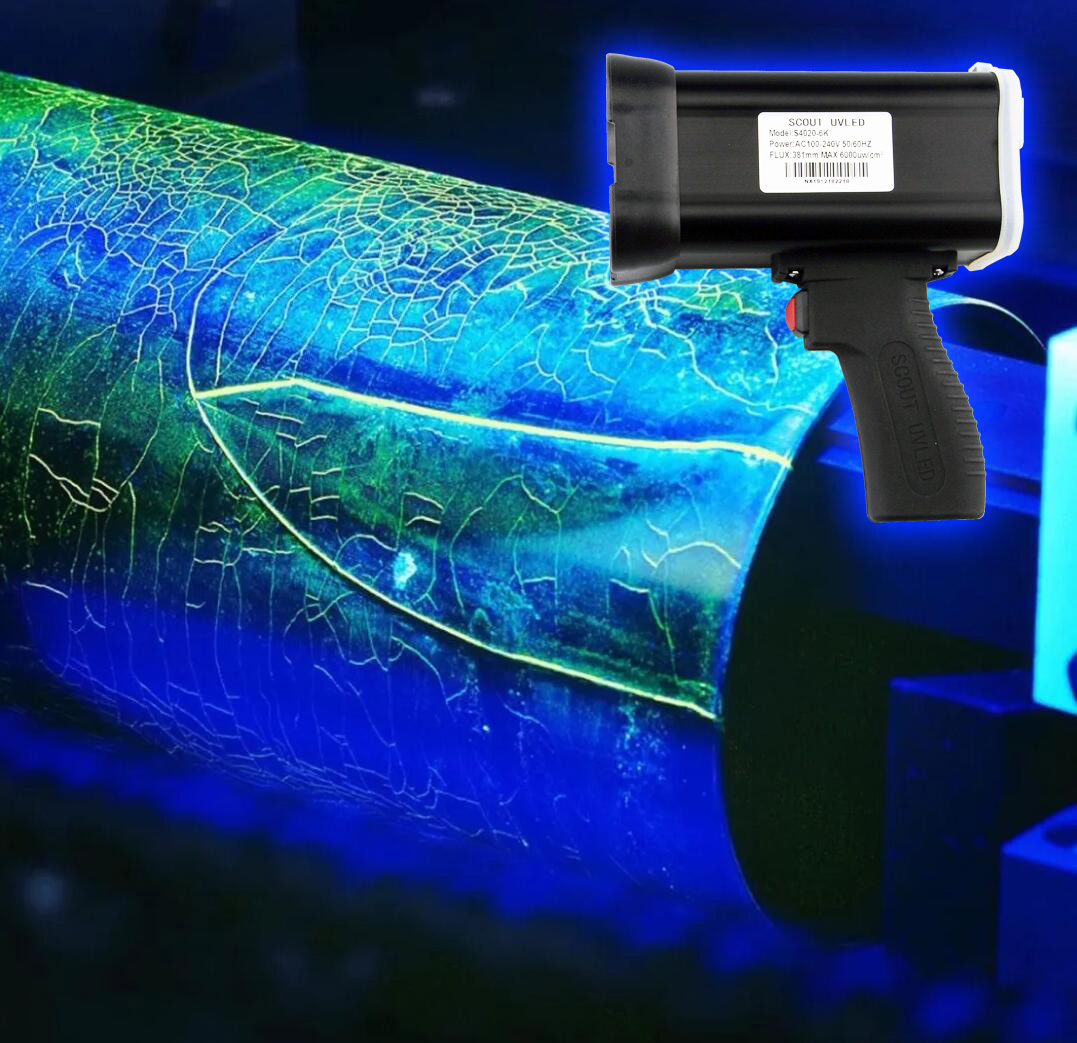
Penetration method is a method of surface inspection, which can detect both metallic and non-metallic materials. Through the application of fluorescent permeation fluid or coloring permeation fluid, under the capillary action of the liquid to penetrate into the defects existing on the surface of the material, and then the image of the surface defects for amplification process, can directly observe the material surface of the existing open defects. Usually the penetration testing method as a means of auxiliary inspection, for example, vehicle maintenance and component performance testing, the application of such testing methods.
Based on the theory of electromagnetic induction, a method called eddy current detection is used to measure the physical and structural defects of different materials by the formation of differential amplitude and phase eddy currents in the environment of alternating magnetic fields. The eddy current method detects surface and near-surface defects in metallic materials. During the inspection process, there is no need for the component to be in contact with the inspection probe, thus meeting the requirements of high-speed, automated inspection. The eddy current inspection method can detect not only ferromagnetic materials, but also non-ferromagnetic materials. Also, the material is not required to have a certain electrical conductivity. Therefore, it can be applied to the detection of a variety of materials. However, it is not easy to process because high frequency excitation signals are generated during the detection process. In the automotive industry, it is mostly used in detector valves, ring seats, and ball pins and other components.
The method of ultrasonic inspection is based on the transmission characteristics of ultrasound waves in different materials, so that the internal defects generated by the material, the location of defects can be accurately located. Because ultrasonic waves have a greater attenuation in the air environment, the surface of the component should be kept clean when inspecting the component, so that the sound waves can be effectively introduced into the interior of the inspected object through a specific coupling material. Under the action of electromagnetic or laser, the material can produce ultrasonic waves, this method is different from the ultrasonic inspection method used in the past, this method does not require coupling material to complete the inspection work, usually used to inspect crankshaft, half-shaft and tappet components.
Magnetic particle inspection methods are mostly applied in the detection of surface defects of components. If the ferromagnetic material is magnetized and there is a certain cracking on the surface of the component, a certain leakage magnetic field is formed on the surface of the component and the leakage magnetic field is detected by a magnet-sensitive element, the characteristics of different defects can be obtained. In this inspection method, no cleaning of the component is required. Therefore, it has a relatively high inspection efficiency and can effectively detect cracks, rust and other defects existing on the surface of the component. The magnetic particle inspection method is not limited by the size of the component, and can inspect components of different shapes and parts, making the inspection process efficient and easy.
Laser holography is a method that uses laser holography to detect defects on the surface and inside of a component. When a component is subjected to different external stresses, different deformations are formed, and there is a certain correlation between the deformations and the defects inside the component. The holographic interference method shines some correlated laser light on the surface of the component, and then through different loading methods such as fluid pressure loading and thermal loading, the surface of the component is deformed slightly, and the shape of the light wave before and after loading is compared, and according to the change of the interference fringe of the light wave, the internal defect of the component is detected.
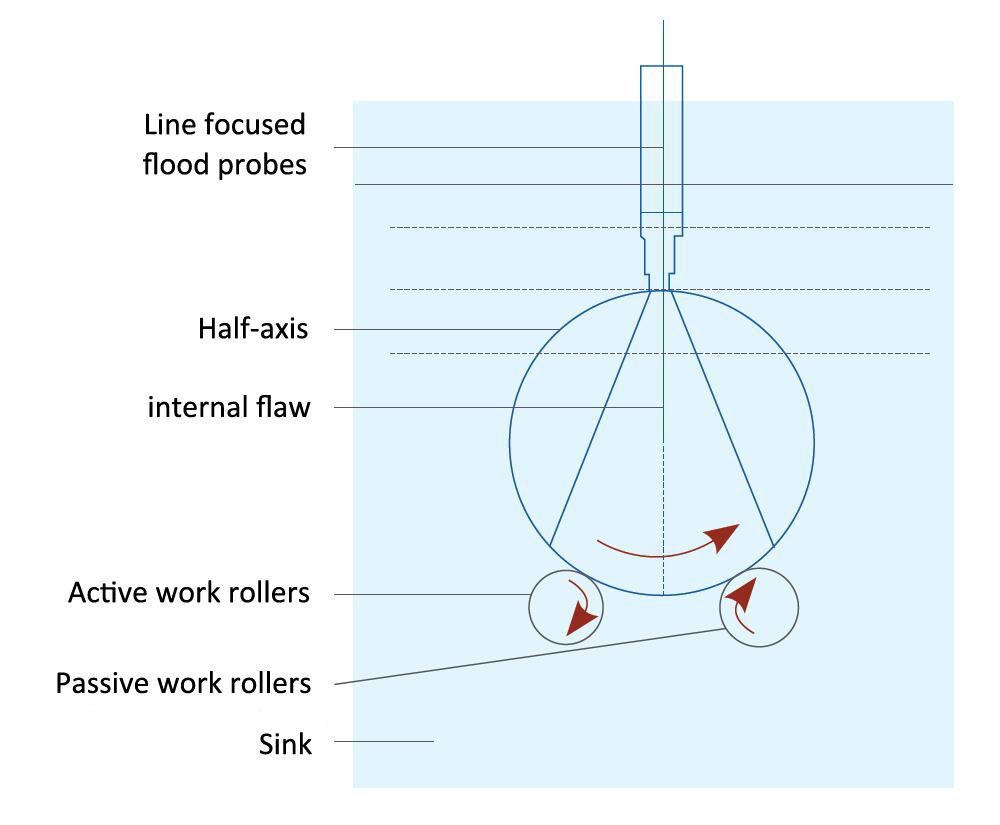
The problem of fracture and failure of automotive half-shafts is mostly due to the high frequency of low stresses on the half-shafts, which causes fatigue damage to the components. Defects within the structure of the half-shaft are the key factor leading to the breakage of the half-shaft. The materials used in the manufacturing of automotive half-shafts and the semi-finished components in the manufacturing process of the half-shaft can be inspected by water immersion using ultrasonic inspection technology. During the inspection process, an electrical pulse signal with a high frequency is converted into an ultrasonic signal using an appropriate probe device, and the coupling agent conducts the ultrasonic waves to the inside of the half shaft. If the ultrasonic wave is defective inside the half-shaft, the acoustical properties of the half-shaft may change, and the returned sound beam will be converted to a higher frequency electrical pulse signal by the probe device. After amplifying the received electrical pulse signal, the defect of the half-shaft member can be judged according to the different reflected wave amplitude, waveform and other characteristics, and the size characteristics and specific location of the defect can be obtained. The detection principle is shown in below figure.
Using ultrasonic detection method, there is a large sound energy in the component, which can improve the accuracy and sensitivity of the detection, and obtain clearer and more stable detection waveform. However, there is a blind zone of about 5cm on the surface of the inspected component.
The focusing characteristics of the magnetic particles enable the detection of defects in the surface and near-surface layers of ferromagnetic and ferromagnetic components. Defects are detected by the magnetic particle inspection method in a variety of parts such as crankshafts, connecting rods, and ball joints in automobiles. When magnetic particle inspection is used, when a material or component is magnetized by a magnetic field, defects in the surface layer or near-surface layer of the material will cause a certain leakage magnetic field to appear at this location. With magnetic particle inspection methods, the focus is on how to build a corresponding magnetic field in the object to be inspected. Since different components have different shapes and sizes, an appropriate magnetization method should be used. For example, to detect defects of connecting rods, it is possible to detect defects in the axial direction of the connecting rods by clamping the different ends of the rods and magnetizing the rods directly by means of electrification. Placing the connecting rod in a coil and allowing the rod to be magnetized can be used to detect defects in the lateral direction of the connecting rod.
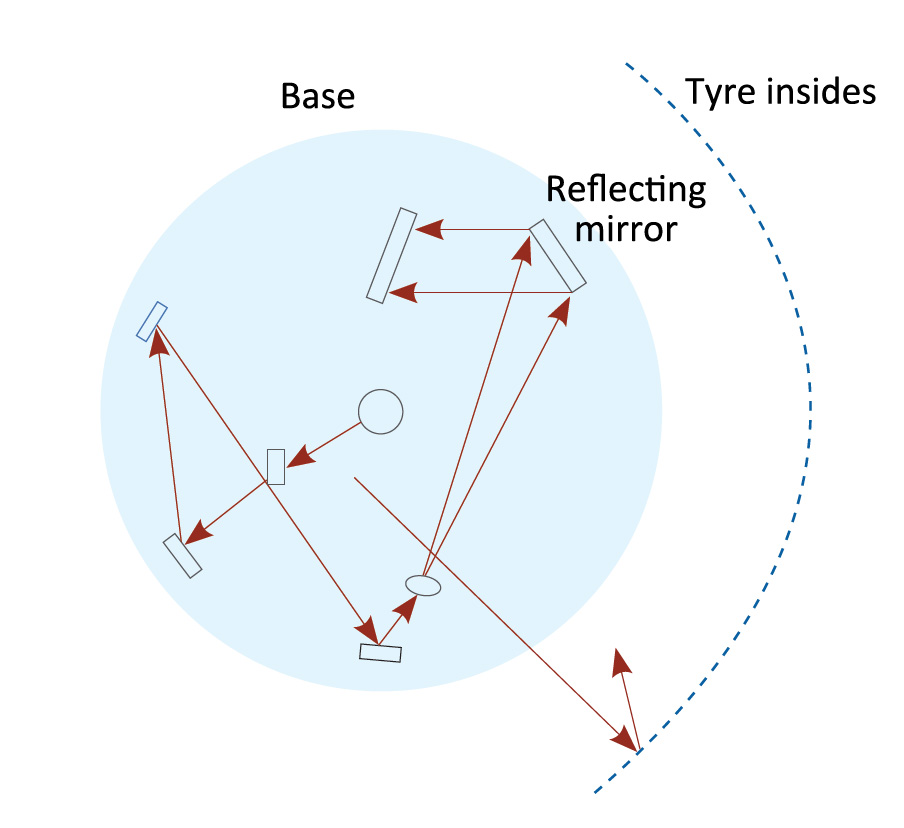
The materials used in the production of automobile tires are rubber, curtain, and nylon filaments, which are made with a multi-layered structure through a certain pattern of overlap. During the production of tires, impurities are easily introduced into the overlapping positions, causing various defects such as bubbles and delamination inside the tire. It is almost impossible to detect the existence of these defects using general testing equipment. During the use of tires, tire defects can lead to the emergence of greater safety hazards. The holographic inspection method is to record the light waves emitted by an object through certain interference and diffraction of light, and use relevant technology to make the light waves reproduced, thus simulating a three-dimensional image of the tire. The defects in the tire can be determined by the abnormal light streaks that appear in the holographic image. The depth of the defect can be calculated by analyzing the distance between the different abnormal streaks. Since the depth of the defect inside the tire is proportional to the distance between the interference streaks, the deeper the defect is, the larger the distance between the streaks will be. Since the type and size of the defects inside the tire vary, the tire should be loaded in such a way that the defects can be presented in the form of local distortion. This is shown in below Figure.
This is done by placing the optical path system on the inside of the tire, placing it in a vacuum housing, and then applying a pressure-reducing loading treatment to the tire and inspecting it for defects.
At the same time of the rapid development of electronic technology and computer technology, NDT technology is also constantly changing towards the direction of rapidization, digitalization, efficiency and proceduralization, and more and more NDT technologies show the characteristics of high sensitivity, high stability and high efficiency. At present, non-destructive testing technology is gradually combining with modern intelligent technology, adaptive technology, computer technology and CAD technology, etc., and gradually developing three-dimensional ultrasonic scanning inspection imaging technology, so as to present the internal structure information of the inspected object more comprehensively and integrate the whole inspection process into the whole stage of the design, production and application of automobile components, so as to make the quality control level of automobile manufacturing. It can be greatly enhanced.

